Shortcuts and commands
Every keyboard shortcut, the typed command line in Sketch Mode, the ribbon, the tools row of each view, the Export menu, the SLD and BOM tools, and the full menu map.
SolarLayout Desktop is driven from buttons, and this page is the map of them: the keyboard shortcuts, the CAD-style aliases Sketch Mode accepts, and every control in the ribbon, the view header, the Export menu and the three menus. The editing shortcuts need a generated layout to act on; the menus work at any time. The window itself is described on The main window.
Keyboard shortcuts
| Keys | What it does | Where it works |
|---|---|---|
| F5 | Generate Layout | The main window |
| Ctrl+1 … Ctrl+5 | Switches to the Layout, Summary, Energy, BOM or SLD view, in that order | The main window |
| Ctrl+N | File ▸ Move to String / Central Window… — opens the New design window and launches another window for the chosen combination | The main window |
| Ctrl+Shift+N | File ▸ New Project — a fresh window at defaults in the same design | The main window |
| Ctrl+S | File ▸ Save Project… | The main window |
| Ctrl+O | File ▸ Open Project… | The main window |
| Ctrl+Q | File ▸ Exit | The main window |
| F1 | Help ▸ How to Use This Tool — the in-app guide | The main window |
| Ctrl+Z / Ctrl+Y | Undo and redo sketch edits | Sketch Mode |
| Ctrl+C / Ctrl+V | Copies the selection and pastes it 5 m east and 5 m north of the original | Sketch Mode |
| Ctrl+Arrow | Nudges the selection 1 m in the arrow's direction | Sketch Mode, with ↖ Move active |
| Shift+Click | Adds the object under the pointer to the selection | Sketch Mode |
| Esc | Cancels the tool in hand; clears a measurement | Sketch Mode |
| Mouse wheel | Zooms at the cursor | Every view but SLD |
The zoom you set with the wheel persists across redraws until you click Home, generate a new layout or load a new boundary file. The nudge moves the whole selection 1 m per press, so eight presses is 8 m — a practical way to shift a run of tables by a known distance without measuring.
The typed command line
Sketch Mode carries a COMMAND line at the bottom of its palette, with the
placeholder "cmd: L PL REC C ARC EL SPL H DIM RO SC MI O AR ↵". Type an
alias and press Enter and the matching tool is armed, exactly as if you had
clicked its palette button. It exists so a drafter who already knows L for a
line and REC for a rectangle does not have to learn a new palette. See
Sketch Mode.
| Group | Alias | Tool |
|---|---|---|
| Draw | L | ╱ Line |
| Draw | PL | ⌒ Polyline |
| Draw | REC | □ Rect |
| Draw | C | ○ Circle |
| Draw | ARC | ◜ Arc |
| Draw | EL | ⬭ Ellipse |
| Draw | SPL | ∿ Spline |
| Draw | H | ▨ Fill/Zone |
| Draw | DIM | 📐 Dimension |
| Draw | T | 🅣 Text |
| Modify | RO | ⟳ Rotate |
| Modify | SC | ⤢ Scale |
| Modify | MI | ⇋ Mirror |
| Modify | O | ⇥ Offset |
| Modify | AR | ▤ Array |
| Edit | U | ↶ Undo |
| Edit | RE | ↷ Redo |
| Tools | M | 📏 Measure |
| Tools | S | ↖ Move |
| Group | G | ⧉ Group |
| Group | UG | ⿲ Ungroup |
Every alias also accepts its long form — LINE, POLY, RECT (or R),
CIR, A, ELL, SP, HATCH or FILL, D, TEXT, MEA, SEL,
ROTATE, SCALE, MIRROR, OFFSET, ARRAY, UNDO, REDO, GROUP,
UNGROUP — and case does not matter. A tool alias confirms itself in the
status bar; an unknown word is reported there as an unknown command.
The tools without an alias — placing a table, a half table, an arrester, a road, a transmission line, or any of the three trench types — are palette buttons only.
Watch the single letters. C arms the circle, T the text tool, H the fill,
O the offset. REC is three letters, and the road tool has no alias at all.
Once a tool is armed, click a start point and type into the numeric entry of
the contextual bar: 25.4<30 is 25.4 m at a bearing of 30°, 10,5 is 10 m
east and 5 m north, and a bare 25.4 runs along the cursor direction or sets a
radius.
The ribbon
The navy bar across the top of every window.
| Item | What it does |
|---|---|
| SolarLayout | The brand |
| Design chip — "Fixed tilt · String inverter ▾", "Tracker · Central inverter ▾" and so on | Opens the New design window and launches another window for a different combination; this window stays open. See Choosing a design mode |
| Status mirror | Repeats the status-bar message in gold |
| Access chip — ● Active — until <date>, ● Access expired, ● Access revoked or ● Access status unavailable | Shows this device's access at a glance; the expired and revoked states carry a Contact Us button. With no access at all the chip is hidden and a gold Get Free Access button shows instead. See How access works |
| Docs | Opens this documentation in your browser |
| Support | Opens the Support / Feedback window. See Getting help |
The app version is always shown at the right of the status bar, next to the live cursor position in UTM metres.
The view tools row
The tools sit right of the view tabs, and the set changes with the view. See Views.

| View | Tools, left to right |
|---|---|
| Every view | Save project · Export ▾ |
| Layout and SLD | Satellite · Wireframe · Piles: OFF (reads Piles: ON when on) · Layers ▾ · Sketch · Home · Pan · Zoom · ⛶ |
| Summary and Energy | Copy · Open in window |
| BOM | The two always-present tools only |
| Tool | What it does |
|---|---|
| Save project | Writes the session to a .slp file — the same as Ctrl+S |
| Export ▾ | Opens the Export menu below |
| Satellite | Draws aerial imagery behind the layout, aligned to the file's coordinates. Needs an internet connection, and a layout |
| Wireframe | Draws tables and tracker units as outlines only |
| Piles: OFF | Turns the pile overlay on; the first use opens the Pile layout window. Needs a layout |
| Layers ▾ | Opens the popover of nine ON/OFF rows: Plant layout, Legend, Lightning arresters, ICR blocks, the three cable rows, Contour / terrain, Plant totals |
| Sketch | Switches Sketch Mode on; leaving the Layout view switches it off |
| Home · Pan · Zoom | Fits the whole plant, drags the view, or drag-zooms a box. While Pan or Zoom is on, a drag is ignored by the sketch tool and a control room cannot be dragged |
| ⛶ | Opens the plot in SolarLayout — Expanded View, a large resizable window with a full toolbar and a ⟵ Return to Main Window button |
| Copy | Puts the summary sheet on the clipboard as tab-separated text |
| Open in window | Opens SolarLayout — Summary with its Summary and Monthly energy (Year 1) tabs |
When the window is too narrow for every tool, Satellite, Wireframe and Piles move to the top of the Layers popover as ON/OFF rows and the button reads Layers ▾ +3. Nothing is hidden without another home.
The Export menu
Export ▾ sits beside Save project. Every item needs a layout and active access, and all are disabled while a run is in progress.
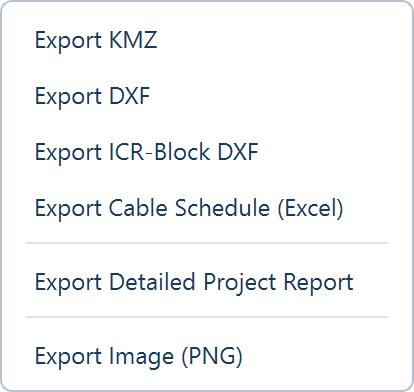
| Item | Produces |
|---|---|
| Export KMZ | The Google Earth file. See KMZ export |
| Export DXF | The layered CAD drawing. See CAD drawing |
| Export ICR-Block DXF | One drawing set: the whole plant, then one sheet per ICR block |
| Export Cable Schedule (Excel) | A workbook with one sheet per ICR block — DC strings and AC or DC-trunk feeders, with recommended conductor sizes. Calculate cables first for real lengths |
| Export Detailed Project Report | The Word document. See Project report |
| Export PDF (with Piles) | The PDF report with the pile drawing and coordinates. Shown only while Piles is on |
| Export Image (PNG) | The plot as it is on screen, as an image file |
Outside the menu: Export TMY data CSV on the Yield tab, the two BOM exports and the two SLD exports below, and Export to Excel… in the pile window.
The Sketch Mode contextual bar
The orange strip above the plot while Sketch Mode is on, left to right. See Annotations for the drawing tools themselves.
| Control | What it does |
|---|---|
| 🧲 Snap | Snapping to corners, edge midpoints and centres; on by default |
| ⊾ Ortho | The orthogonal constraint |
| ▦ Grid and its spacing | The reference grid, spaced 10.0 m (0.5–1000 m) |
| 🎨 Colour | The stroke colour for new annotations, orange-red until you change it; strokes are 1.5 pt |
| Layer combo, +, 👁 | The active annotation layer (0 to start), a new layer, and show or hide the active layer |
Numeric entry — len<bearing or dx,dy → Enter | A typed length and bearing, or offsets, for the tool in hand |
| E: — N: — | The live cursor position |
| ↶ Undo / ↷ Redo | Step back and forward through sketch edits — the same as Ctrl+Z / Ctrl+Y |
SLD tools
The SLD view takes over the left column with the SLD TOOLS panel and has no command line. See Single-line diagram.
| Control | What it does |
|---|---|
| Generate: Automatic / Manual | Builds the diagram from the layout and the bill of materials, or starts a blank sheet. Nothing is generated until you choose |
| ↖ Move/Select · 🗑 Delete · ╱ Wire · 📝 Text | Select and drag, remove, draw a wire, place a label |
| The symbol grid | Places a symbol on the next click. See Symbols |
| 🖼 Import Image Symbol / 🗑 Delete Image Symbol | Traces an image into a vector symbol through the Symbol Editor, or removes one |
| Rotate: angle spin, ⟳ Apply, ⟲ 90° | Rotates the selection by the typed angle (0–360°, step 15, default 90) or by 90° |
| 🔗 Group · ✂ Ungroup · ⧉ Copy | Groups, breaks apart, or duplicates the selection |
| ✋ Pan · 🔍 Zoom · ⤢ Fit | Navigates the sheet; turn Pan or Zoom off to edit |
| 🗑 Clear SLD | Empties the sheet |
| Full SLD (per-ICR / per-feeder) | Automatic only: off draws one annotated feeder with multiplicities, on draws parallel feeders converging on per-ICR transformers |
| 📄 Import PDF / DXF · ✖ Remove BG | Places the first page of a drawing as a background image to draw over, or removes it |
| ⬇ Export SLD to DWG · ⬇ Export SLD to PDF | The diagram on its own. See SLD export |
| Hide Layout & Energy Summary | Hides the plant chip row |
Exit SLD in the blue banner hands the left column back.
BOM tools
The BOM view takes over the left column with the BOM TOOLS panel. See Bill of materials.
| Control | What it does |
|---|---|
| ➕ Add Row · 🗑 Delete Selected Row | Edits the table; double-click any cell to edit it in place |
| ⚙ Rebuild from Layout | Recomputes every line from the layout, discarding edits |
| BOM Template: and 📥 Load Template | Chooses Plant (auto-computed) or the one built-in template that matches the current design, and opens it in its own window. See Templates |
| ⬇ Export BOM to Excel · ⬇ Export BOM to PDF | The bill of materials on its own |
| Hide Layout & Energy Summary | Hides the plant chip row |
Exit BOM in the green banner hands the left column back.
Menu map
Three menus, nine items. An item ending in an ellipsis opens a window.
| Menu | Item | What it does |
|---|---|---|
| File | New Project — Ctrl+Shift+N | Opens a fresh window at defaults in the same design |
| File | Move to String / Central Window… — Ctrl+N | Opens the New design window and launches a new, independent window for the chosen mounting and inverter combination; the current window stays open |
| File | Save Project… — Ctrl+S | Writes the whole session — inputs, layout, sketch edits, diagram, bill of materials, terrain — to a .slp file |
| File | Open Project… — Ctrl+O | Reads a saved .slp file back |
| File | Open Sample Site | Loads the bundled sample: one boundary with a pond, a transmission line and an obstruction |
| File | Exit — Ctrl+Q | Closes the application |
| Edit-Pile | Define Pile Layout… | Opens the Pile layout window for the reference table |
| Help | How to Use This Tool — F1 | Opens the in-app guide |
| Help | License / Subscription… | Opens the window that shows this device's access and requests it |
Saving and opening are covered on Projects; the pile window on Piles; the licence window on Activate this device.
Where to go next
Summary view
Every row of the Summary view — how the per-plant sheet is laid out, what each row reports, which rows rename with the design, and when a row reads — or 0.
Glossary
Every term used across these pages, defined — with the values the application ships and a note wherever it uses a word differently from the industry.